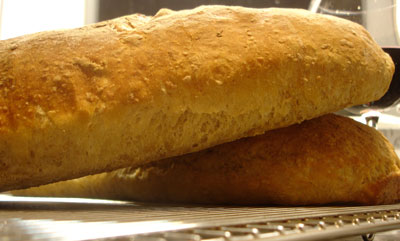
Keep a supply of flour, yeast, oats and whole-wheat pastry flour on hand and you will have the tools to make a bread that rivals the flavor of any crusty loaf at the bakery, but for a fraction of the price. Here's the recipe:
EASY ARTISAN BREAD
Credits: Julia Child’s baguette, Mark Bittman’s No-Knead Bread, Jim Lahey of Sullivan Street Bakery)
Makes 2 slim loaves, or one suitable for sandwiches
Beyond using only cold water, this recipe is very forgiving. Make it in three days by retarding the risings in the refrigerator, or make it in one day by leaving the mix on the counter – or anything in between. Use whole-wheat pastry flour if you have it, or more unbleached white flour if you don’t. Use oatmeal if you can, or don’t. But keep the proportions the same. If you prefer a sour flavor, leave the Day 1 mix out on the counter for a day or two before moving to the second step. This recipe is easily doubled.
DAY 1
In medium bowl, stir together:
1 teaspoon active dry yeast
1 tablespoon (scant) kosher salt
2 cups cold water, filtered if possible
1 cup old-fashioned oats
1 cup whole-wheat pastry flour
1 cup all-purpose unbleached flour
Cover and refrigerate.
DAY 2
Stir in:
1-1/2 to 2 cups unbleached white flour, plus more
Dough will be quite sticky. Sprinkle in additional flour – about 1 tablespoon at a time – (remember, less flour is better) to reduce surface stickiness and to allow dough to release from the side of the bowl, using first a curved dough scraper or big wooden spoon as you add small amounts of flour, and then switching to your hand. I usually rotate the bowl with my left hand while gradually tucking my right hand deeper beneath the dough until it releases. When dough can be gathered and lifted, scoop it up into your hand. Dump remaining flour out of the bowl and drizzle olive oil into the bowl – just enough to grease the bottom of the bowl. Holding the dough seam-side down, plunge it into the oil, spin it around and flip it over, revealing the oiled dough on top. Cover and refrigerate.
DAY 3
Flour
3 tablespoons corn meal (optional)
Flour your fist. Punch down dough. Flour the rest of your hand, gather the dough and turn it out onto a lightly floured work surface.
Roll into a log; cut into as many loaves or rolls as you prefer, taking care to make them roughly the same size so they bake at the same speed. (I usually make two loaves with this recipe.)
Shape each loaf first by flattening dough with karate chops. Then fold lengthwise into loaves, using scant bits of flour to keep the dough manageable. To shape rolls, gather dough into a circular mound.
Place shaped loaves/rolls on a baking sheet, sprinkled generously with corn meal or with a sheet of parchment paper, allowing room to double during rising. Cover with a floured towel and place in a warm place to double (or put in refrigerator overnight).
Place oven rack in lowest position. Add baking stone if available. Heat oven to 475 degrees.
With scissors, slice three deep slits diagonally, equidistant across loaves to allow for controlled expansion in the oven.
Bake for about 28-35 minutes, or until bottoms are deep golden brown.


